Sunday, December 7, 2008

December Pics

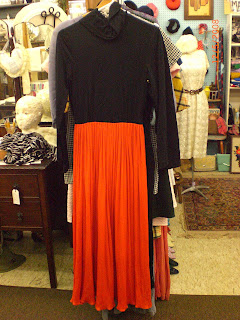
Here are some photos of the merchandise that I have put in the shop recently.


Thursday, December 4, 2008

DIY #7: Adding fun buttons to a winter coat

Sorry, there's no "before" photo, but just imagine
this coat with plain faux-shell buttons.
(The photo is kinda bad, so just in case you can't tell...the new buttons are teal.)

Suggestions: When you find a winter coat with great shape and fabric, but boring buttons, you can still save it by adding colorful/interesting buttons. In fact, "new" buttons can make one of the biggest differences in a garment - always consider changing that first (it could save you a lot of effort).
Inspiration: confections (cupcakes, candy, etc.), and a jacket from the Fall 2006 Trovata collection.
Tools: winter coat (from your closet or a second-hand store), interesting buttons that are the right size for the buttonholes (you can get these from secondhand stores, etsy.com, ebay, sewing stores, Hobby Lobby, or from other coats), thread that matches the buttons or coat, scissors, sewing needle.
Difficulty Level: 1 (easy as pie)
Wear with...a cute vintage hat or beret (preferably teal or mustard)

There really aren't even any steps. Just remove the old buttons and sew on the "new" ones.
So simple!

Saturday, November 29, 2008

DIY #6: Pepping Up a Plain Skirt, Vol. II

Sorry that there's no "before" pic.
Just imagine a plain black velvet pencil skirt.

Suggestions: There are innumerable things you can do to a pencil skirt, but here I have sewn on a section of an accordion skirt to the front/side to add sultriness, swing, and a touch of surrealism.
Inspiration: 1940s noir films, the famous fashion surrealist Elsa Schiaparelli, a Lanvin collection from a few years ago
Tools: Pencil Skirt (it's best if it's a high quality, sturdy fabric - such as wool, velvet, sateen, etc.), a section cut from an accordion-pleated skirt (a somewhat flowy fabric with crisp pleats - wool, cotton, silk, etc.) preferrably in a contrast color, thick thread or think yarn in a fun or muted color, regular sewing thread in the same color as the accordion piece, hand-sewing needles (one regular size and one big enough for the thick thread/thin yarn), scissors, stick pins
Difficulty Level: 2 (Fairly Easy)
Wear with...A feminine blouse, nylons, and patent peep-toe stacked heels

1. Pin the accordion piece onto the front/side of the waistband, making sure that the pleats are overlapping each other (so that the pleats will softly open at the hem), and secure by hand stitching across in the regular thread with the regular needle.
2. Sew a few jagged rows of pick stitching in the thick contrast thread at the top of the accordion panel. Sew on some non-functional buttons, sequins, or beads if you wish.
3. You will need to "slightly attach" the bottom part of the panel to the skirt so that the panel does not flop around. Sew a few little knots (w/ regular thread & needle) at about 5 random points on the hem of panel, thus "slightly attaching" it to the skirt - so that it swishes, but doesn't flop about. (Confusing enough?)

That's it!

DIY #5: Easiest Trench Update Ever!

Suggestions: There are several things one can do to a plain trench coat to pep it up, but here's a quick fix that anyone with an iron can do.
Inspiration: Kate Hudson wears a coat similar to this in Le Divorce (except the patch on her coat is on the sleeve), a movie I love because I'm a francophile. And 1940s movies where the women look like gorgeous spies in their trench coats and berets.
Tools: Trench coat or almost any thin overcoat, military/preppy iron-on patch, iron & ironing board
Difficulty Level: 1 (easy as pie)
Wear with...anything from dark skinny jeans and an American Apparel tee to a vintage 1940s dress and a beret

No instructions even! Just place on the chest of the coat and iron till it's secure. That's it!

Friday, October 3, 2008

DIY #4: Cupcake Dress

Sorry there's no "before" picture, but imagine a sad, boring blue cotton shirtdress.

Our suggestions: We chose to change the plain shell buttons to red vintage buttons, to scallop the hem and trim it with red piping, and to sew on some pickstitching with red yarn along the sleeve hem and in a bird silhouette on the chest. These are just a few ideas you can choose from.
Inspiration: The 1940s...and actual cupcakes. Ps. After I made this dress, there were a lot of scalloped edges on the Spring 2009 runways (Christopher Kane and Chloe especially).
Tools: Plain shirtdress, interesting buttons, piping, thick thread or super-skinny yarn, a needle with a big enough "eye" to thread the yarn through, scissors, measuring tape, cardstock paper, pins, pen/marker.
Difficulty Level: 5 (Advanced)
Wear with...Red patent heels and a cute vintage hat


1. To create the scalloped hem...measure out according to the hem of the dress how many scallops you can fit and how big you want them. I would go for bigger scallops because it's easier - probably 12-18 total (6-8 in front and 6-8 in back) and probably about 2 1/2" deep and 5 1/2" wide at the top. Create a scallop "template" out of cardstock (it will look like a half-circle), pin along hem and mark or trace along the hem. Finally, you can cut! (For a quick & dirty version, just skip the above steps and eyeball it. Just simply cut!)

2. Clean finish (meaning turn under the raw edge and sew) the scalloped hem with red piping (or whatever color is appropriate). A pickstitch along the edge is optional.

3. Remove the sad original buttons and add fun red buttons (or whatever color/style is eye-catching).

4. Pickstitch along the cuff, neck, waistline, button placket, etc. in a contrast color (I chose red of course). Just go nuts.

5. Create a stencil out of cardstock for your pickstitch embroidery. I chose a bird, but the options are limitless...hearts, flowers, umbrellas, skeleton keys, balloons, etc. Pin the stencil to the garment in the chosen location (chest, hem, etc.), and pickstitch using thick thread (the kind used for cross stitching) or super-thin yarn.

And there you have it! Quite a big of work, but well worth it.

October Pics

Here's some new Fall stuff that we've put in the store in the last few weeks.